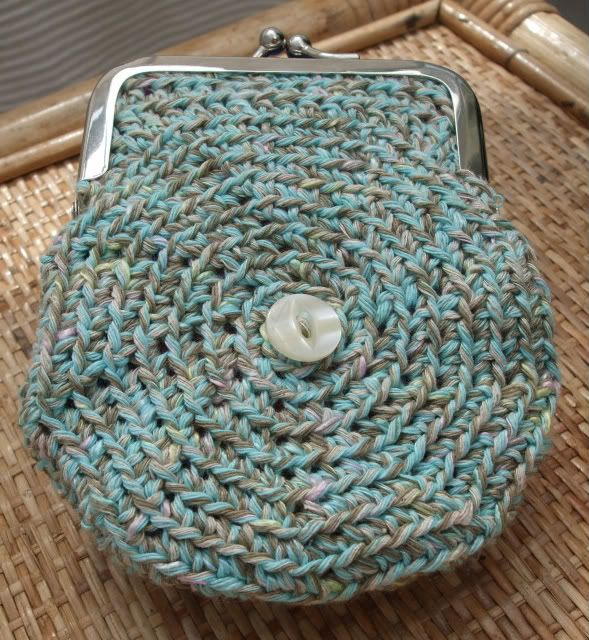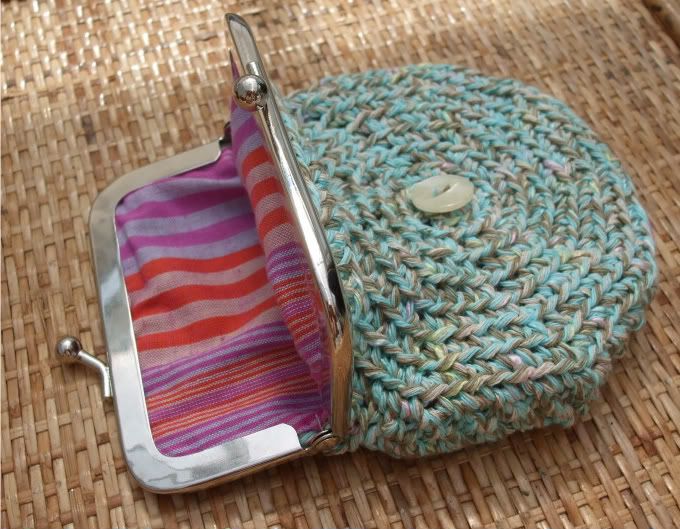
You will need around 55 metres of aran weight yarn (I used Patons Dew) a 4.5mm crochet hook, two buttons, some material for lining, a yarn needle, a sewing needle, some thread, a 10cm x 5cm purse frame and some textile glue. (I got the frame and glue from http://www.u-handbag.com/ )

Approximate gauge: diameter after 9 rows = xcm, 16sts = 10cm to fit purse frame.
It's easy enough to adjust the purse size depending on the frame. The purse diameter can be increased by adding rows follwing the same increase of 9 sts per row (or omitting rows for a smaller diameter) and the top of the purse can be adjusted by increasing or decreasing the number of htr in the centre of row 10. For more depth add rows of dc.
Abbreviations (note all terms used in this pattern are in UK terminology):
st - stitch
sts - stitches
blo - Back loop only
Ch - chain
sl st - slip stitch
dc - double crochet
htr - half treble
tr - treble
dtr - double treble
WS - wrong side
RS - right side
Pattern:
Purse body - make 2
Ch5 sl st into 1st ch to join.
Row 1: Ch 2 (counts as dc) 8dc in circle. (9sts)
Do not join. Work rows in a spiral. Mark end of each row with a stitch marker and move up as purse progresses. All sts worked in blo.
Row 2: 2dc in each dc around (18sts)
Row 3: (Dc in next dc, 2dc in next dc) Repeat around. (27sts)
Row 4: (dc in next 2dc, 2dc in next dc) Repeat around (36sts)
Row 5: (dc in next 3dc, 2dc in next dc) Repeat around (45sts)
Row 6: (dc in next 4dc, 2dc in next dc) Repeat around (54sts)
Row 7: (dc in next 5dc, 2dc in next dc) Repeat around (63sts)
Row 8: (dc in next 6dc, 2dc in next dc) Repeat around (72sts)
Row 9: (dc in next 7dc, 2dc in next dc) Repeat around (81sts)
End of spiral rounds.
Row 10: dc in next dc, htr in next dc, tr in next dc (dtr, ch1, dtr) in next dc, tr in next 2 dc, htr in next 9dc, tr in next 2dc, (dtr, ch1 dtr) in next dc, tr in next dc, htr in next dc, dc in next dc, sl st into next dc. End off.
Row 11: With RS facing join yarn to right hand corner (ch1 sp between dtr) Ch2 (counts as dc) working in blo htr in each st across ending with htr in ch1 sp (16 htr)
Row 12: Turn work ch2 (counts as htr) working in blo htr in each st across. (16 htr) End off.
To make up the purse:
with WS facing sew around circular part of purse only. Turn the right way round. Sew a button to the centre of each side of the purse.
Fold the lining material in half and trace around purse. Cut out. With RS facing sew around circular portion of lining. Place inside the purse body and place a few sts around the open edge of purse to hold lining in place. With the textile glue, attach purse body to frame.


